Selling AI art prints online involves more than just image generation. You need to process the generated image to meet print standards. You cannot simply take the AI-generated art and resize it. If you do so, your art prints will look pixelated and blurry, which can definitely lead to customer complaints. To ensure high-quality, crisp art prints, it is important to upscale the generated art using an AI tool to the largest size most commonly used for art prints. The most popular largest size for art prints offered on online platforms, such as Etsy, is 24″ x 36″. Therefore, this tutorial will walk you through a step-by-step process to upscale AI art to this popular size without losing quality.
Why 24” x 36” should be your upscale standard for prints
The most commonly purchased largest art print size online is 24″ x 36″. You can read the article After Analyzing 100+ Bestsellers, These Are the Most Popular Wall Art Sizes on Etsy to learn about the most popular sizes for art prints. Therefore, you should upscale your artwork to the largest popular size, as smaller sizes are easier to prepare from a larger one by simply resizing it.
What is the ideal resolution?
The print standards require a resolution of 300 PPI (Pixels Per Inch). AI-generated images are 72 PPI. Therefore, you need to not only increase the size of AI-generated images but also upscale the resolution from 72 to 300 PPI. While you have to manually set this output setting in the Topaz AI Upscaler, Lightroom automatically generates 300 PPI resolution.
Upscaling tool options
There are two of the best upscaling tools available on the market:
- Topaz Gigapixel — One-time upscale up to 6x
- Lightroom (uses Topaz Gigapixel only) — One-time upscale up to 4x
What AI upscalers do differently
AI does not merely increase an image’s size; it enhances it by adding its own realistic details, so the larger image does not pixelate. AI models are trained on millions of images, both low- and high-resolution; therefore, they know best what the image actually depicts and how to add missing details. On the contrary, if you are just manually stretching the image, the enlarged image lacks detail, making it blurry and pixelated.
The Process
Generate images with the largest possible size
It is always best to get the largest possible size directly from AI image generators. A larger original file provides more detail and needs less upscaling.
Example: The same art image has been generated using different resolutions of the Adobe Firefly Image 5 Model. 1K resolution generates 896 x 1152 px while 2K resolution 1808 x 2320 px. You can see that the larger-sized file has more detail and texture than the smaller-sized file.
Smaller image size generated with Adobe Firefly Image 5 Model in 1K resolution (896 x 1152 px). The image has fewer details.
Larger image size generated with Adobe Firefly Image 5 Model in 2K resolution (1808 x 2320 px). This image is highly detailed.

1. Apply AI Denoise
AI denoise removes the haziness of an AI-generated artwork and is always recommended before upscaling. However, if your artwork has a specific art style, such as canvas and paper textures and subtle paint strokes, AI denoise will also remove them, as it treats them as noise. This can change the feel of the entire artwork and can make a detailed illustration look flat.
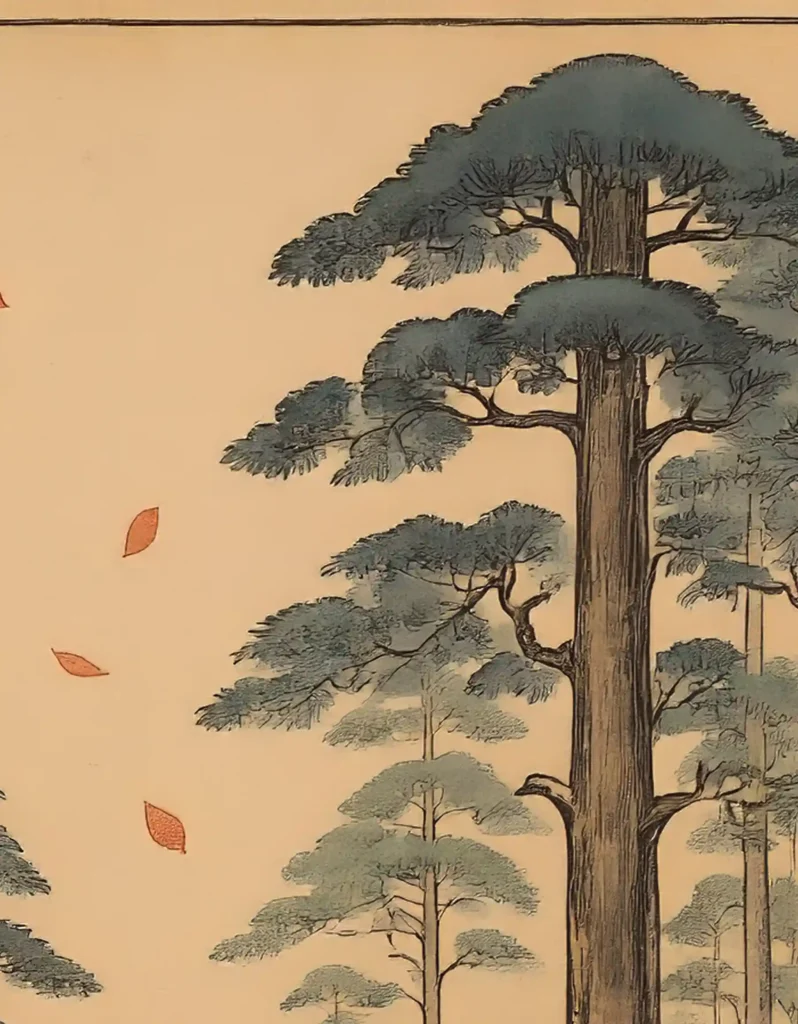
In the example below, you can see the side-by-side comparison of the original image vs the denoised image. When the AI denoise is applied, it removes the paper texture and leaves the trees with large, solid-color patches, making the artwork look flat.
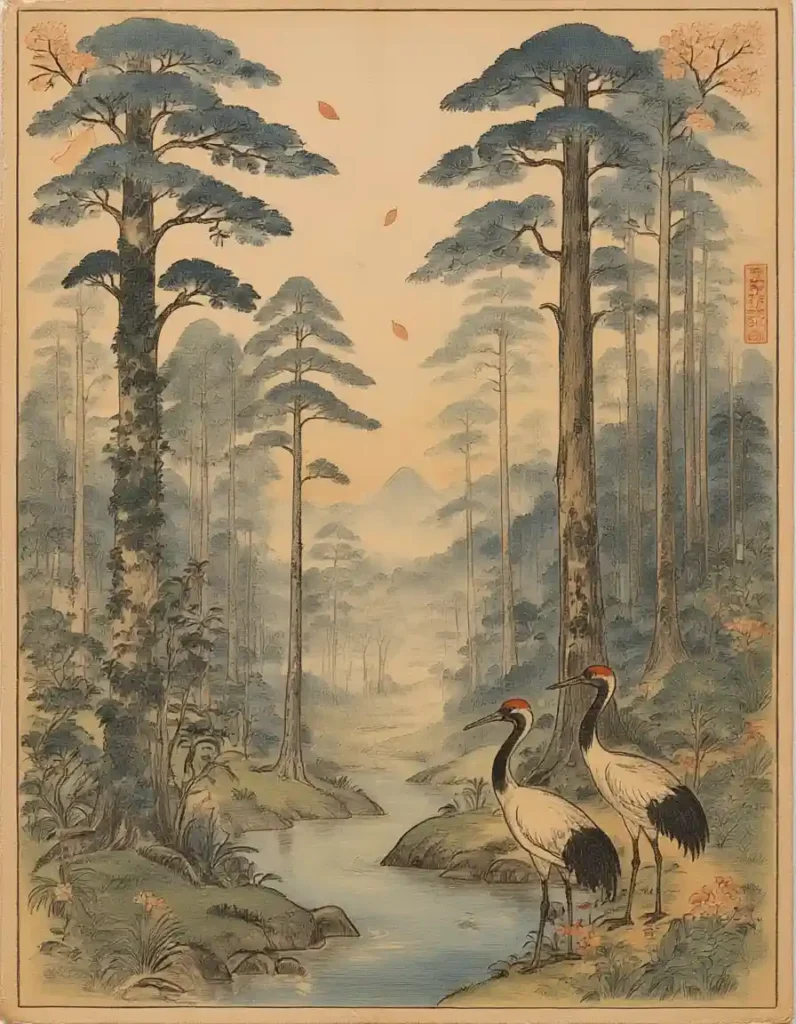
Original AI artwork with paper texture
100% AI-Denoised artwork with large patches of solid color and no paper texture. The image looks flat.

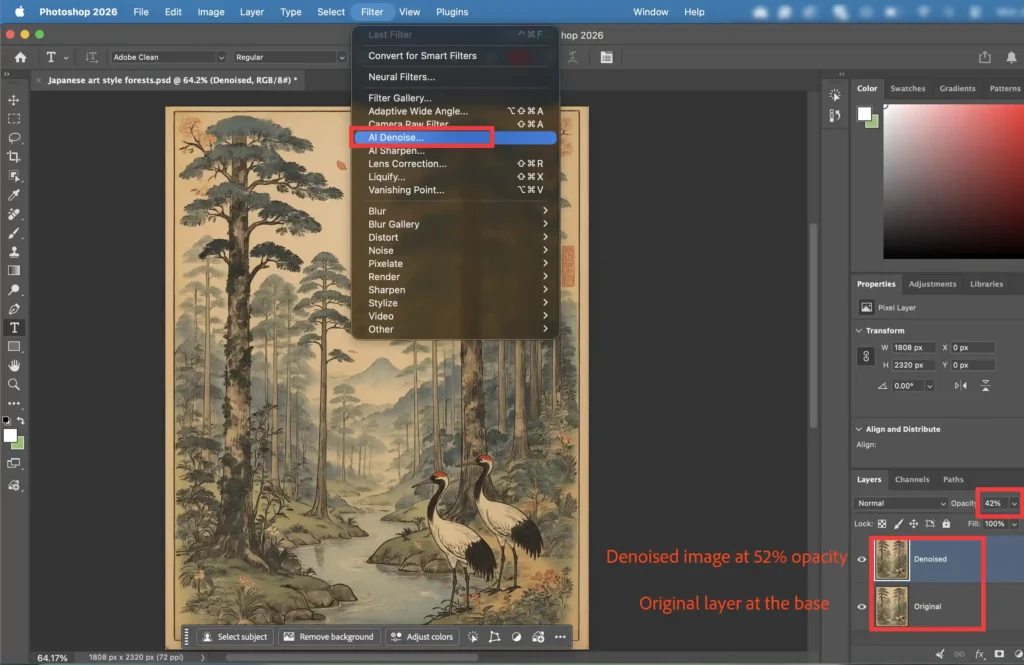
The best way to overcome this issue is to overlay the denoised image layer at 40-60% opacity over the original image layer in Photoshop to preserve original textures.
You can see in the screenshot below that the original image was copied, placed above it, and denoised. The opacity of the denoised image layer was set to 42% to capture the texture of the original image.
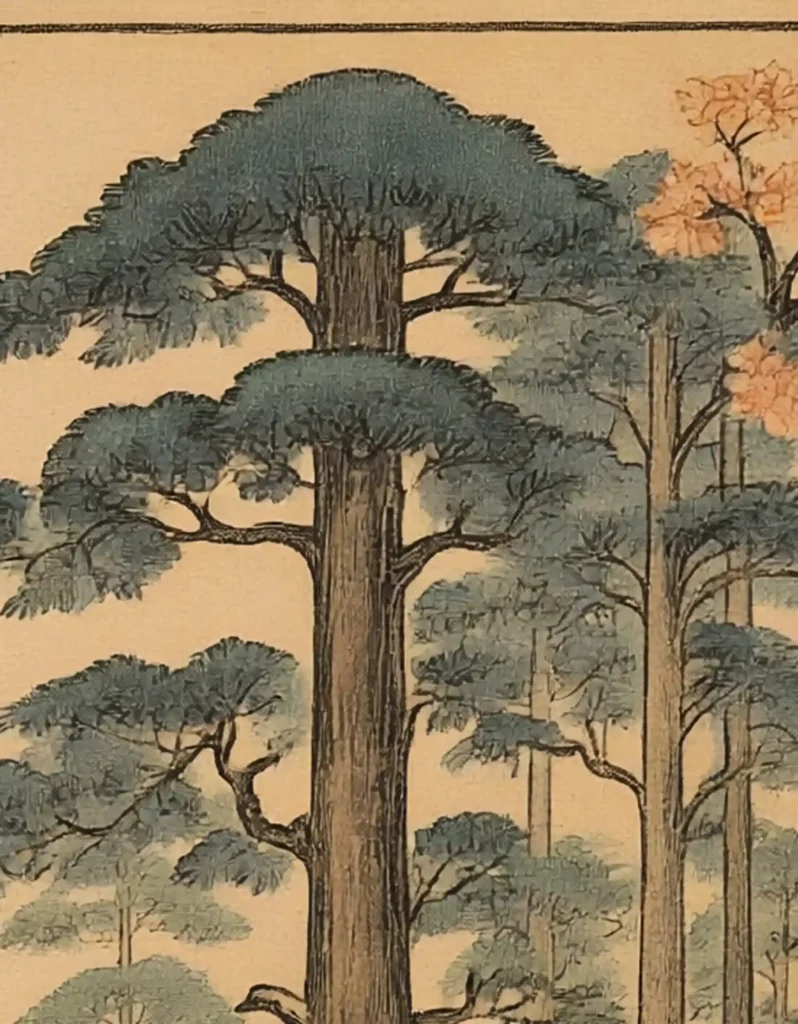
The Result
The result is far superior to blindly applying denoise. The denoised image layered above the original image at 42% not only removed the haziness but also preserved the original textures.

2. Upscale the image
Every upscaler tool has its own maximum upscale limit. Topaz Gigapixel lets you upscale up to 6x in a single run, while Adobe Lightroom lets you upscale up to 4x.
How much should you upscale for 24” x 36”?
The latest versions of Adobe Firefly and Midjourney AI models can generate images with dimensions of around 2000 px on each side. Therefore, 4x is the best upscale option. When you upscale at 4x with 300 PPI output, the image size is around 8000 px on each side, which is enough for 24” x 36” prints. Therefore, upscaling beyond 4x can significantly increase the file size and is useless.
Why Adobe Lightroom for upscaling?
Lightroom offers up to 4x upscaling in a single run, which is sufficient to achieve 24” x 36”. If you have a Lightroom and Photoshop combo plan, you also get access to a wide range of image-editing options not offered by stand-alone upscalers. Plus, the image editing options in the Adobe suite are highly flexible and go beyond just moving the basic sliders. Therefore, Adobe tools are highly cost-effective.
Adobe Lightroom Upscale limit
Adobe Lightroom has an input limit of 56 MP for upscaling. For example, if your image size is 8000 x 8000 px, it is 64 MP (64,000,000 px). Since this image exceeds 56 MP, it can not be upscaled. However, this input limit does not restrict your ability to make print-friendly 24” x 36” prints from the AI-generated artwork.
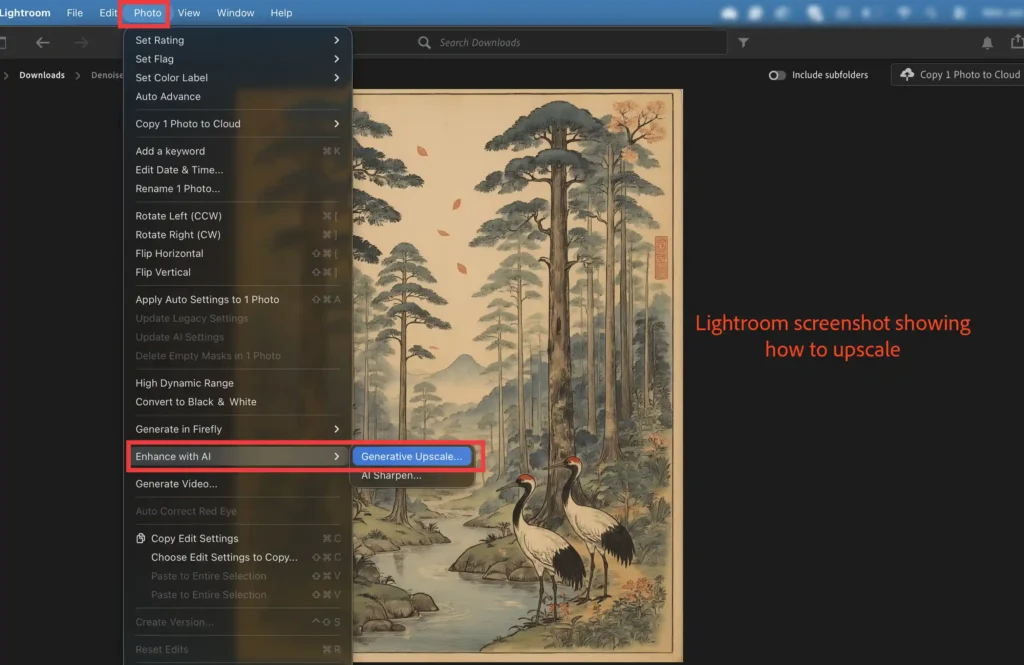
How to upscale?
As you can see in the screenshot below, open the denoised image in Lightroom, go to Enhance with AI on the Photo menu, click ‘Generative Upscale’, and choose the 4x option.
The result
Lightroom upscaled an 1808 x 2320 px at 72 PPI image to 7232 x 9280 px at 300 PPI. The upscaled image is saved separately as a DNG file.
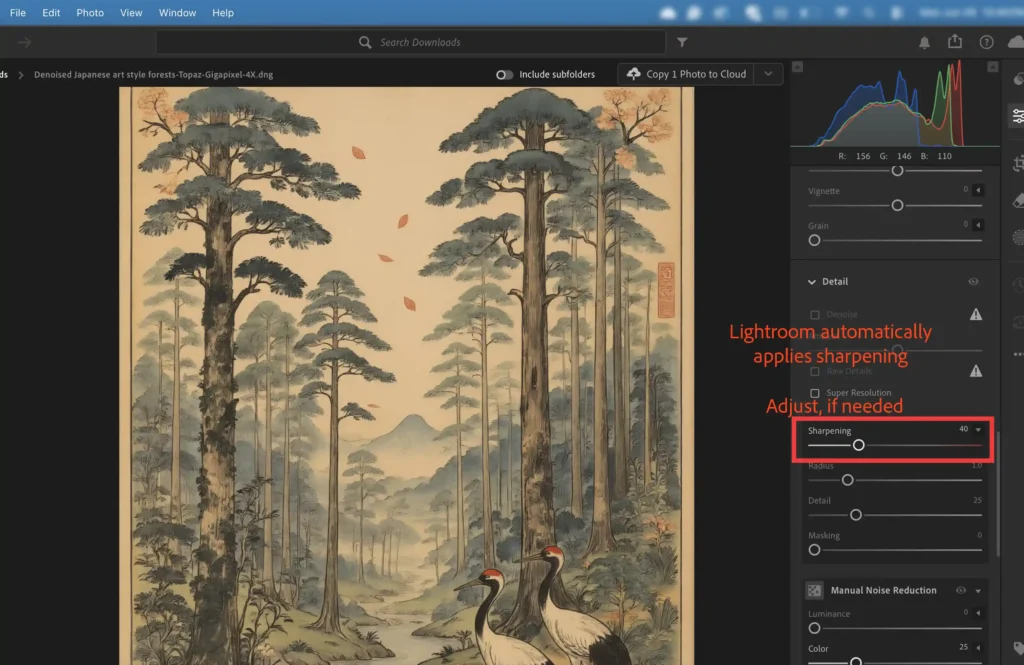
3. Adjust the Sharpening (if needed)
Lightroom automatically applies sharpening after the generative upscale. You can adjust the slider if you think it’s needed. In the case of our image, there was no need for any further adjustment.
4. Check the final upscaled image
After upscaling the image, you should always check the photo by zooming in to 100% in Photoshop. You should make sure the image does not pixelate or look hazy. If it is clear and sharp, the upscaled image has met the print standards. However, if the upscaled image is pixelated or hazy, then you should analyze the reasons behind it. If the original image is pixelated, the AI upscaler won’t fix it. Furthermore, hazy images can also result from not applying denoising before upscaling.
You can see a side-by-side comparison of the original and the final upscaled image at 100% zoom. You will notice a huge difference: the new image is extremely sharp and clear, with no haziness, unlike the original image.
BEFORE
AFTER


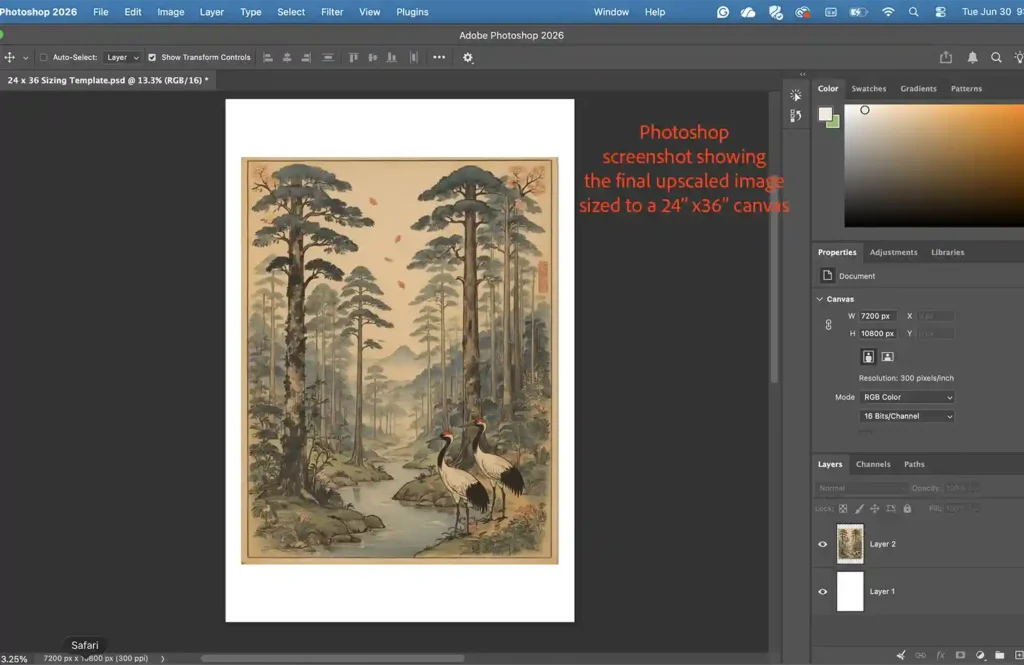
5. Size the upscaled image
Create a photoshop file with the following settings:
Width: 24 Inches
Height: 36 Inches
Resolution: 300 Pixels/Inch
Color Mode and Color Profile: RGB/8-bit or CMYK/8-bit (depending on the print provider’s requirements).
Color Profile:
RGB – sRGB IEC61966-2.1
CMYK – GRACoL2006 or Coated FOGRA39 (depending on the print provider’s requirements).
Once you create the Photoshop file with the correct settings, bring the final upscaled image into it. You can stretch the image to fit the canvas. If stretching the image cuts out the edge details you want to include, you can resize it to leave white borders around the image. This trick not only prevents cutting the important parts of an image but also gives your prints a fine-art look.